GlowHost is happy to inform our customers that we are an optimized partner of CloudFlare.
That means that our customers can enable CloudFlare from cPanel directly (without changing nameservers) and benefit from Railgun Dynamic website optimization and compression.
Let's go through steps required for enabling CloudFlare and Railgun for your domain.
1. Login to your cPanel account and find the CloudFlare icon in Software/Services section.
Enabling CloudFlare
2. The CloudFlare page will ask you to enter your email address and agree with their Terms of Service. Please enter a real email address, since it will be needed for accessing some advanced settings. After that click on the "Signup Now!" button.
Done? Congratulations, you have registered your account with CloudFlare!
3. After you signup with CloudFlare, your control panel will show domains you currently have.
Once you click on the grey cloud near your domain, CloudFlare will be enabled for that domain.
That's all. Your website is using CloudFlare now! Please note that by default only www. record is enabled in CloudFlare. That means that www.domain.com will go through CloudFlare servers. If you want to enable other records, you will need to click on "Manage" near where your domain name is listed.
Enabling RailGun Website Optimization
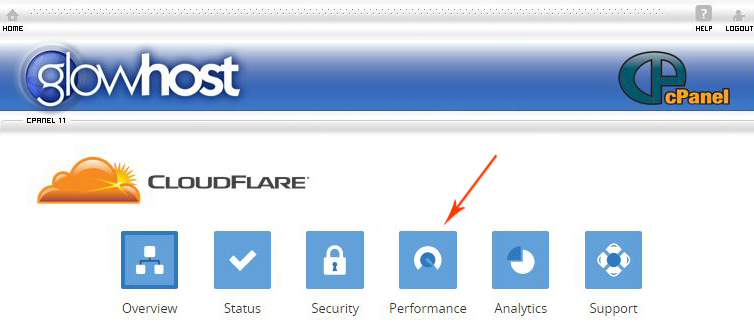
1. In order to enable RailGun, please login to cPanel and click on "CloudFlare" in Software/Services section.
2. Choose the "Performance" item in the menu bar.
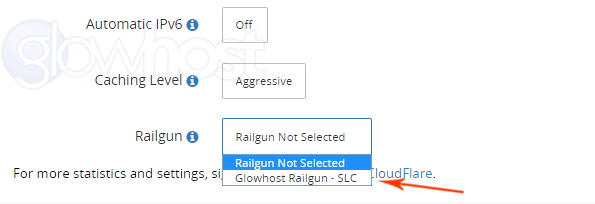
3. You will be forwarded to the Performance settings page which has several options. Please scroll down and find the "Railgun" option. There you will need to click on the dropdown menu and change setting from "Railgun not selected" to "GlowHost Railgun".
That's all. You can find information about Railgun here. To cut the long story short, Railgun optimizer helps to compress data between datacenters and speeds up your websites. We do hope that you will enjoy this new feature. Thank you for hosting with us!


 LinkBack URL
 About LinkBacks


 Reply With Quote
 Support has tried to help, but it seems the best advise is not to use the "Free" CloudFlare, or upgrade my reseller account to a Cloud Server - VDS
